Showing posts with label project. Show all posts

Wednesday, February 8, 2012

Quick DIY eyeglass holders

If you sew at all you probably have some small pieces of fleece in your stash of scraps. And if you have more than one person in your house you probably also have eyeglasses and sunglasses stashed in purses, cars, drawers and closets without cases.

Years ago I used up some of my fleece scraps making these very quick eyeglass holders. We still have them and still use them all the time.  I forget how many I made, but I made them in various sizes to hold different size glasses.  Those wrap around type sunglasses really need a big case, but reading glasses only require a slim little case.

I also had some scraps of flannel so I cut some small squares of it with pinking shears, to keep it from fraying, and added an extra, shorter piece of fabric when I sewed the edges of the case together to make a pocket for the little flannel cleaning cloth.

Thursday, May 19, 2011

Progress Report on the Landscaping

When we bought our home in Utah last summer this flower bed by the front steps was a slope of dirt and weeds. We'll be moving soon and I won't get a chance to see how all of my hard work looks once it's had a chance to fill in, but I thought I'd show some photo updates.

How it looks now all terraced and with new perennial plants. The Alberta spruce is a dwarf variety that should only get to be about 5 ft tall. There is another set further back on the other side of the front steps as well. The carpet phlox in the upper portion should gently cascade over the top of the rocks
In progress last autumn. I hauled rocks from elsewhere on the property in to terrace the bed.


Hoping these flowers fill in nicely this summer. The purple and yellow flowers will complement the house color.

Wednesday, January 26, 2011

How To: Make a window fan shade


My son has one of those half moon shaped windows in his room. Custom blinds for these things are very expensive. The best option I found was something called a Redi Shade you can buy at Lowes or other places for 20 something dollars and cut to size, but it comes in basic white and needs to be stuck down with velcro. This window is better uncovered in winter so that light and warmth come into the room, but in summer the sun just beats in due to a western exposure. I wanted something I can remove in winter and replace in summer without dealing with adhesive velcro strips.


This window is 22 inches high and 46 inches wide so it's not a perfect semi-circle. And the arch is something like 6 ft so I knew I needed a long piece of paper to make a fan for it. Rolls of wall paper were not wide enough. I went to a teaching supply store and got a roll of 48 inch by 12 ft paper that is used to cover bulletin boards. This one has a cloud design, but they had many colors and patterns. This cost about $8.50. It also comes in different sized rolls both larger and smaller.


At a building supply store I bought two wooden slats 1 1/2 inches wide by 2 ft long for $1 each and painted them to match. These attach to the ends of the fan to weigh it down and hold it in place in the window. These were cut to just under 22 inches and I drilled a hole in one end for a ribbon to go through later.


The roll of paper is long and wants to roll back up so you need to weigh it down to work with it. I cut 5 inches off the width so that when folded in half it would be just under the 22 inches (height of the window).


I found I couldn't work on a tabletop to fold the 12 foot roll in half (so that the finished fan would be double sided) because it kept wanting to roll up. I needed a long stretch of floor to work. 

Live and learn: it would have been MUCH easier to work with a single thickness instead of double. Also, I should have used double sided tape and sealed all three open edges before trying to fold it into a fan. If I did it again I would definitely not fold it, but only use one layer of paper.

I used my quilting ruler and a bone folder to impress guide lines every 2 inches so that I could fold it evenly. This took a long time! I didn't want to use a pencil since I wanted this to be double sided.

I used white glue to stick the wooden slats to the ends of the fan.

I used a hole punch and stick on hole reinforcements to make a path to string ribbon through to gather the fan. The ribbon also went through the holes that I drilled in the wooden slats.


Friday, January 21, 2011

Foolish Friday


Knock Knock !
Who's there ?
Sadie.
Sadie who ?
Sadie Pledge of Allegiance.


I'm volunteering for the art docent program at my son's elementary school. The kids just completed this project in the style of Henri Rousseau making "naive" art pieces that demonstrate foreground, middle ground and background.


Wednesday, September 8, 2010

Flower bed project update


For those of you who have been following my blog, you know we recently purchased a house that needs some TLC. I have already shown some photos of upcoming yard projects.  Here is an update on one that is nearly completed--the flower bed between the front porch steps and the house.

Before--just a slope of hard packed dirt

In progress--I dug out rocks from another part of the yard that were inexplicably just left in the grass to mow around for the last 17 years
In progress--my son enjoyed this project because I unearthed a lot of worms.  He's 9.

After--a retaining wall I made with the rocks to keep the whole thing from washing away. I added a lot of compost to improve the soil. I hauled the extra dirt away to fill washed out trenches in another part of the yard.

After--one little lonely dwarf Alberta spruce planted for now.  I have another to put on the other side of the steps when I get that dug up. I will plant some flowers next spring--or possibly put in some pansies soon.

Wednesday, December 23, 2009

Christmas Break Activity

When you have a kid home from school for Christmas break it helps to have some activities planned. Today my eight year old son Caleb and I sat down and painted these ornaments. I had actually meant to purchase some from Dunkdesigns shop on Etsy, but she finished for the season before I got around to it.

Emperor penguin ornament I painted for my son. He's really into penguins.

Snowman and Santa ornament my son painted

Caleb's favorite animal--the tapir. Not just everyone has a tapir ornament!

snowflake ornament by Caleb

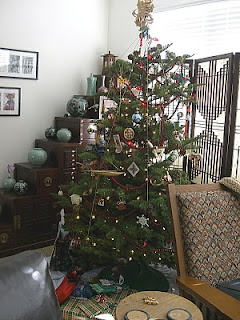
Our tree

Merry Christmas!

Thursday, December 3, 2009

Homefront Team Contest

I am a member of the Homefront Team. We're a team of spouses of U.S. Military members who have shops on Etsy. We are currently having a "Bits and Pieces" challenge on Facebook to make items using mostly scraps of whatever materials we usually work with to create handmade items for our shops. This is my entry:


CAPSTONE memory wire bracelet made using all my "orphan" beads, misshapen pearls, oddly shaped gemstone beads and beads that just got away from me during a project and found later and didn't bother to put back. I think it turned out well despite, or perhaps because of, all it's imperfections.


To see all the entries click here and log-on to Facebook. To vote for your favorite, type "VOTE" in the comments section under that photo.

The winner will receive notice on the Homefront Blog and on the Homefront Facebook fan page.

And, yes, the bracelet is already sold, but I plan to make more that are somewhat similar soon!